Automated Page Turner
1. Activity Overview
- Understand basic servo motor principles and operation
- Learn fundamental CircuitPython programming concepts
- Develop skills in mechanical connection and mounting
- Apply assistive technology principles to everyday challenges
- Create a functional device that solves a real accessibility need
Page turning can be challenging for individuals with limited hand mobility, strength, or dexterity. This project creates a simple yet effective assistive device that can help users independently turn pages in books, magazines, or documents, promoting reading independence and access to printed materials.
2. This Month's Box Contents
New Equipment
Digital Resources
3. Prerequisites
Previous Knowledge
Household Items Needed
4. Core Concepts
Technical Principles
Design Considerations
Accessibility Factors
5. Step-by-Step Instructions
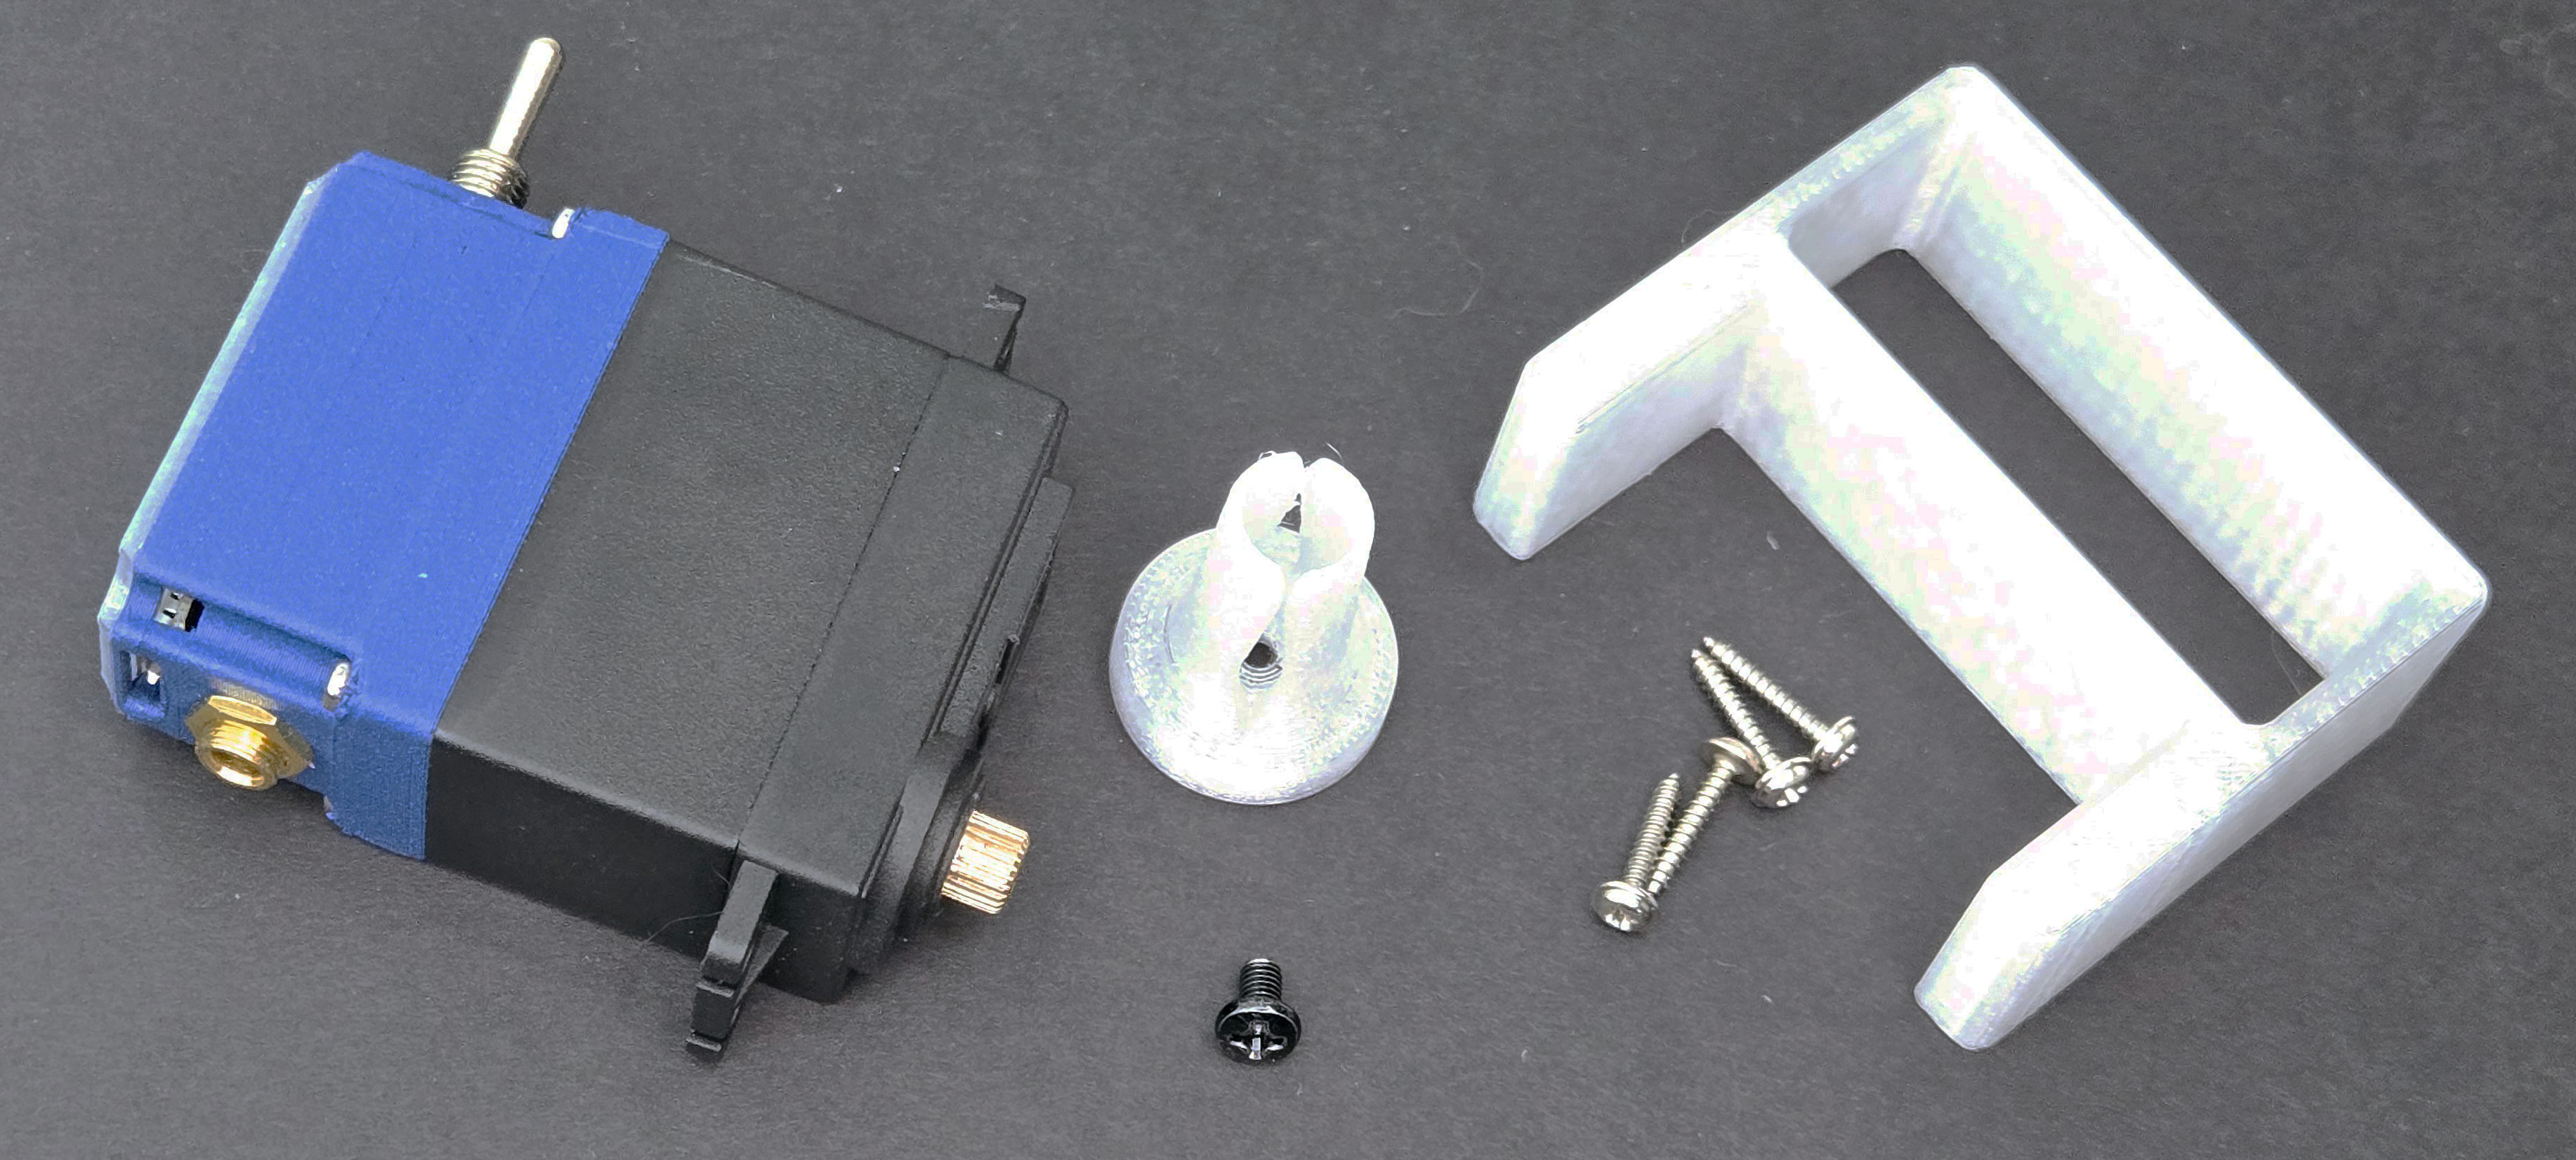
Unpack Your Components
Carefully remove all items from the box and identify each component using the contents list.
Set aside the mounting hardware and tools for later use.
Connect Your Smart Servo to Computer
Plug the USB Programming Cable into your Smart Servo.
Connect the other end to your computer's USB port.
You should see a new drive appear on your computer called "CIRCUITPY".
Prepare Your Programming Environment
Navigate to the CIRCUITPY drive.
You'll see a file called "code.py" – this is where your program will go.
Open this file with any text editor (Notepad, TextEdit, etc.).
Delete any existing code to start fresh.
Prepare the Mounting Base
Identify the mounting base plate from your kit.
Choose a location on your desk or table where the page turner will be used.
If using temporary mounting, attach removable adhesive to the bottom of the base plate.
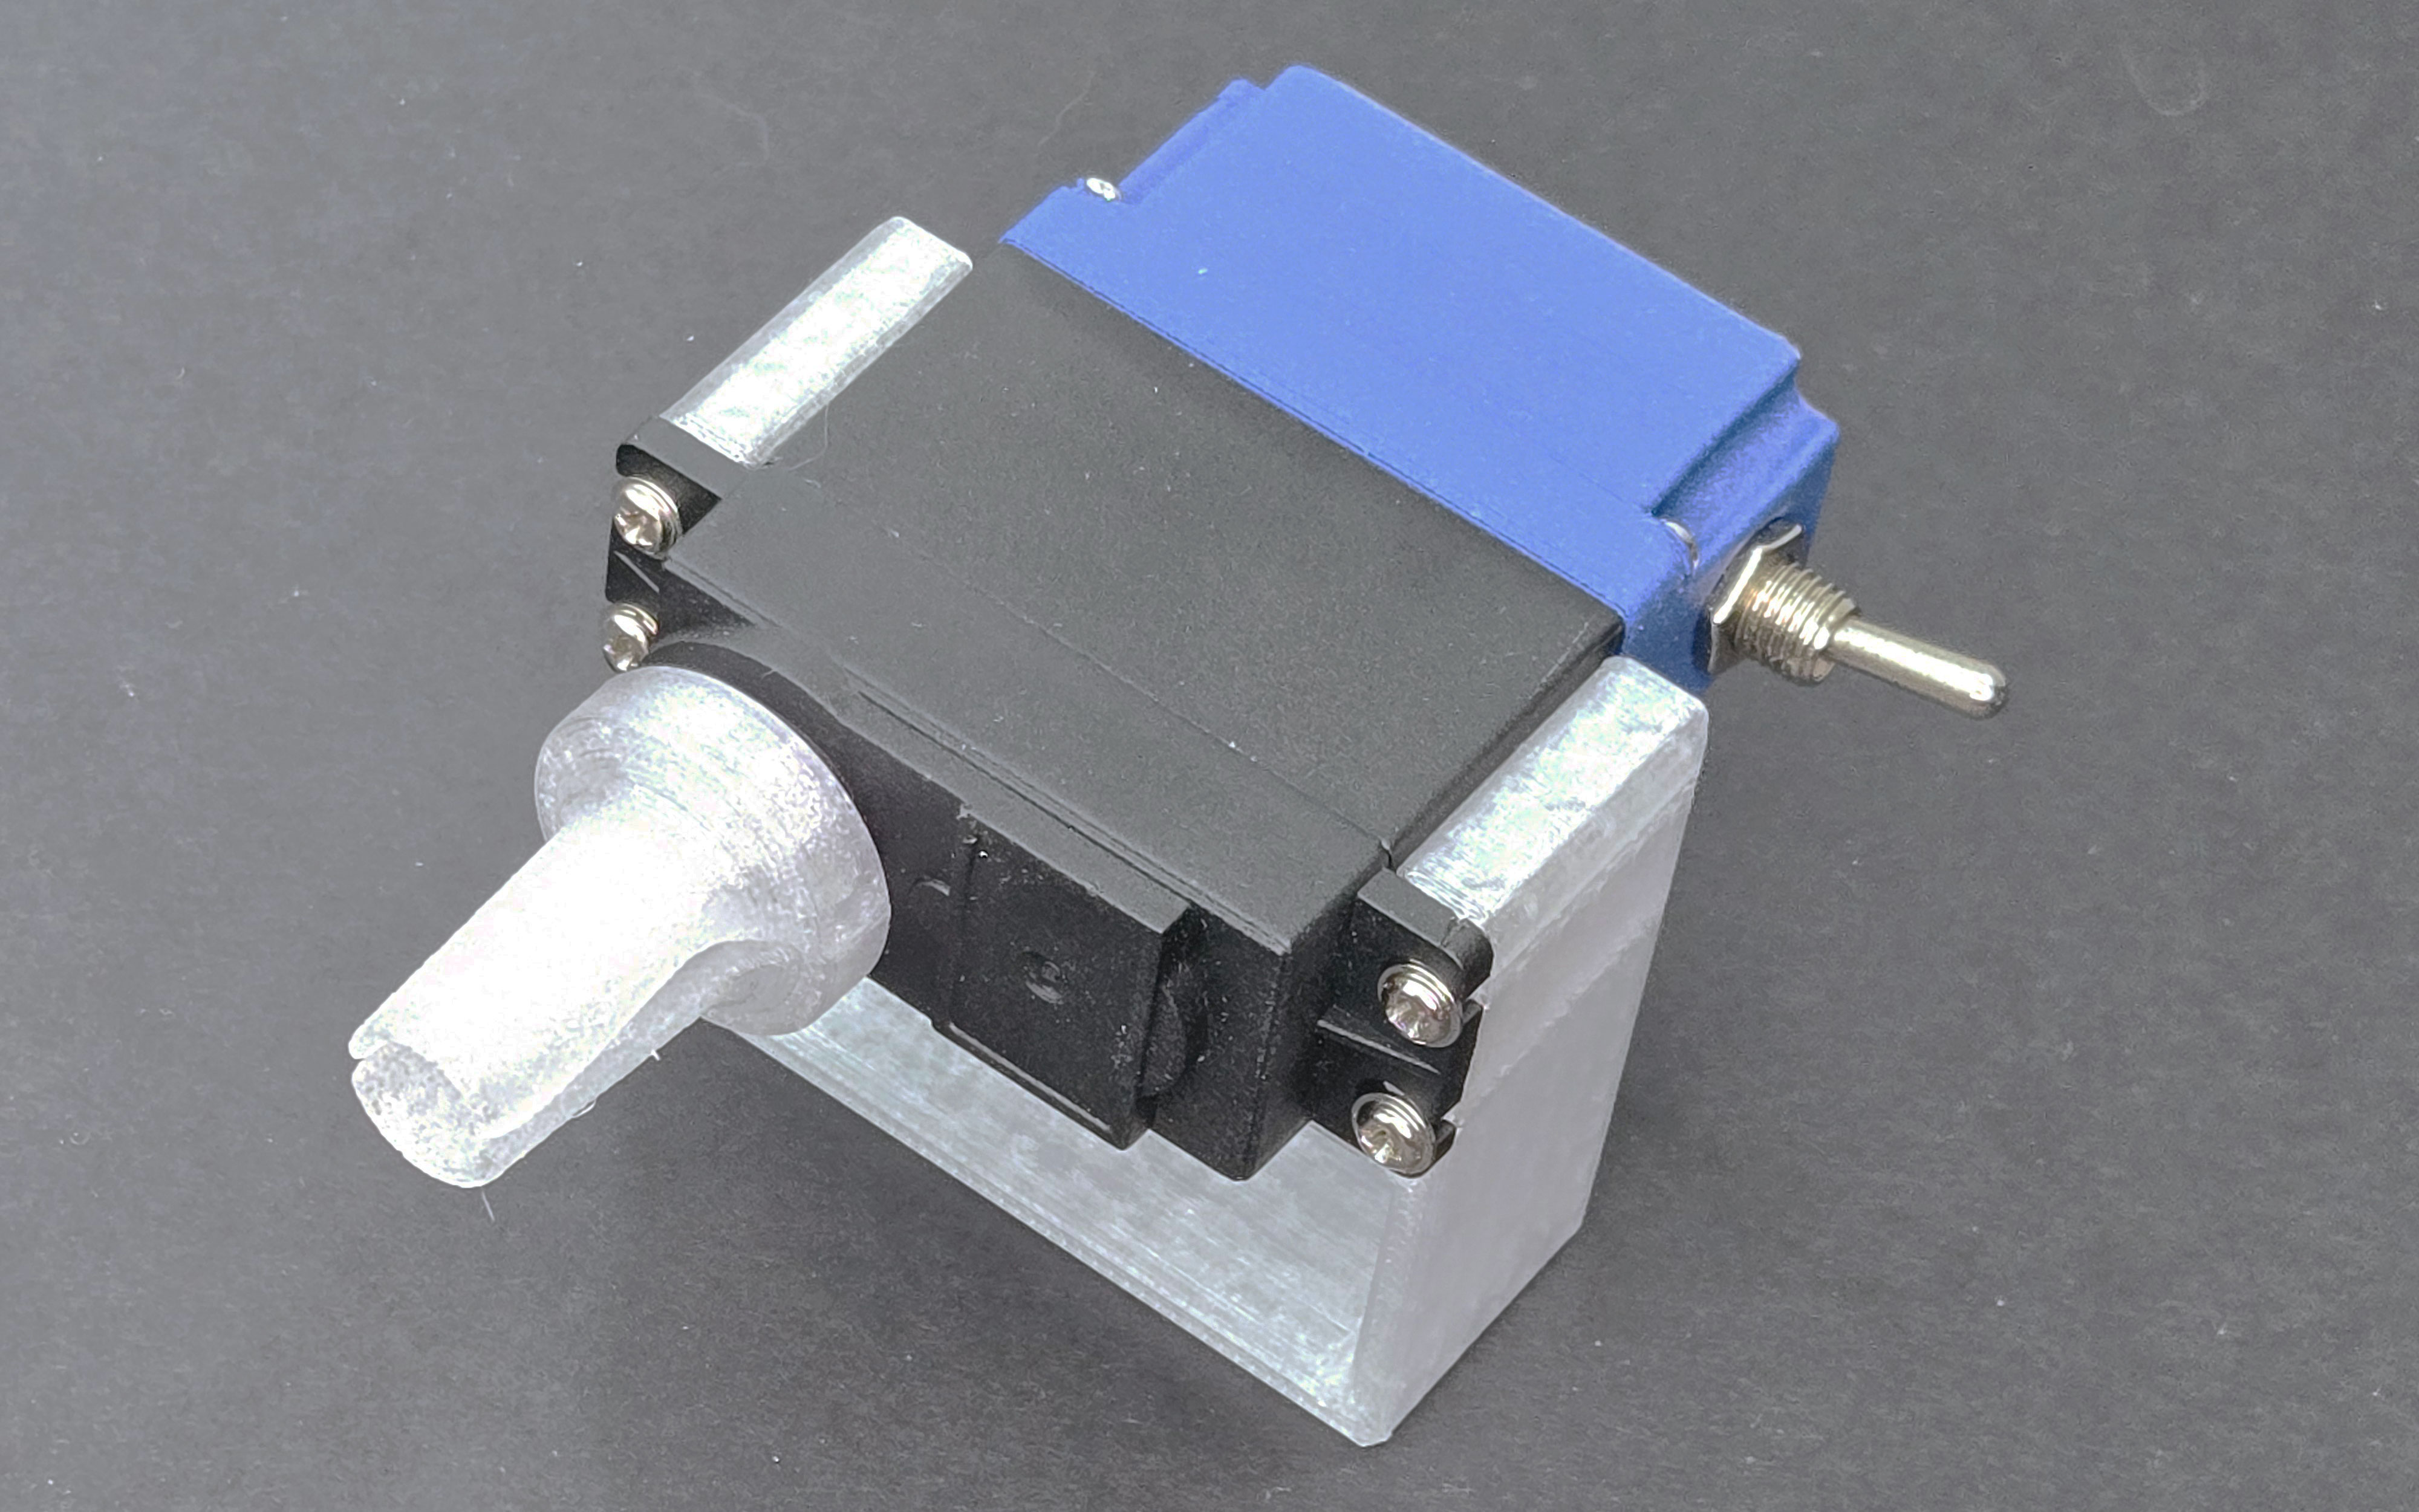
Attach the Smart Servo
Use the Phillips screwdriver to attach the Smart Servo to the mounting base using the provided screws.
Make sure the servo output shaft is positioned toward where the book will be placed.
Select and Attach Servo Horn
Choose the longest servo horn from your kit for maximum reach.
Attach it to the servo output shaft using the small screw provided with the servo.
Position the horn so it's pointing away from the book when the servo is at 0° (starting position).
Prepare Page Turner Attachment
Take the plastic page turner attachment from your kit.
If desired, add a small piece of craft foam to the tip for better grip.
Attach it to the end of the servo horn using the M5 screw and nut.
Tighten using the Allen wrench, but not so tight that it can't be adjusted later.
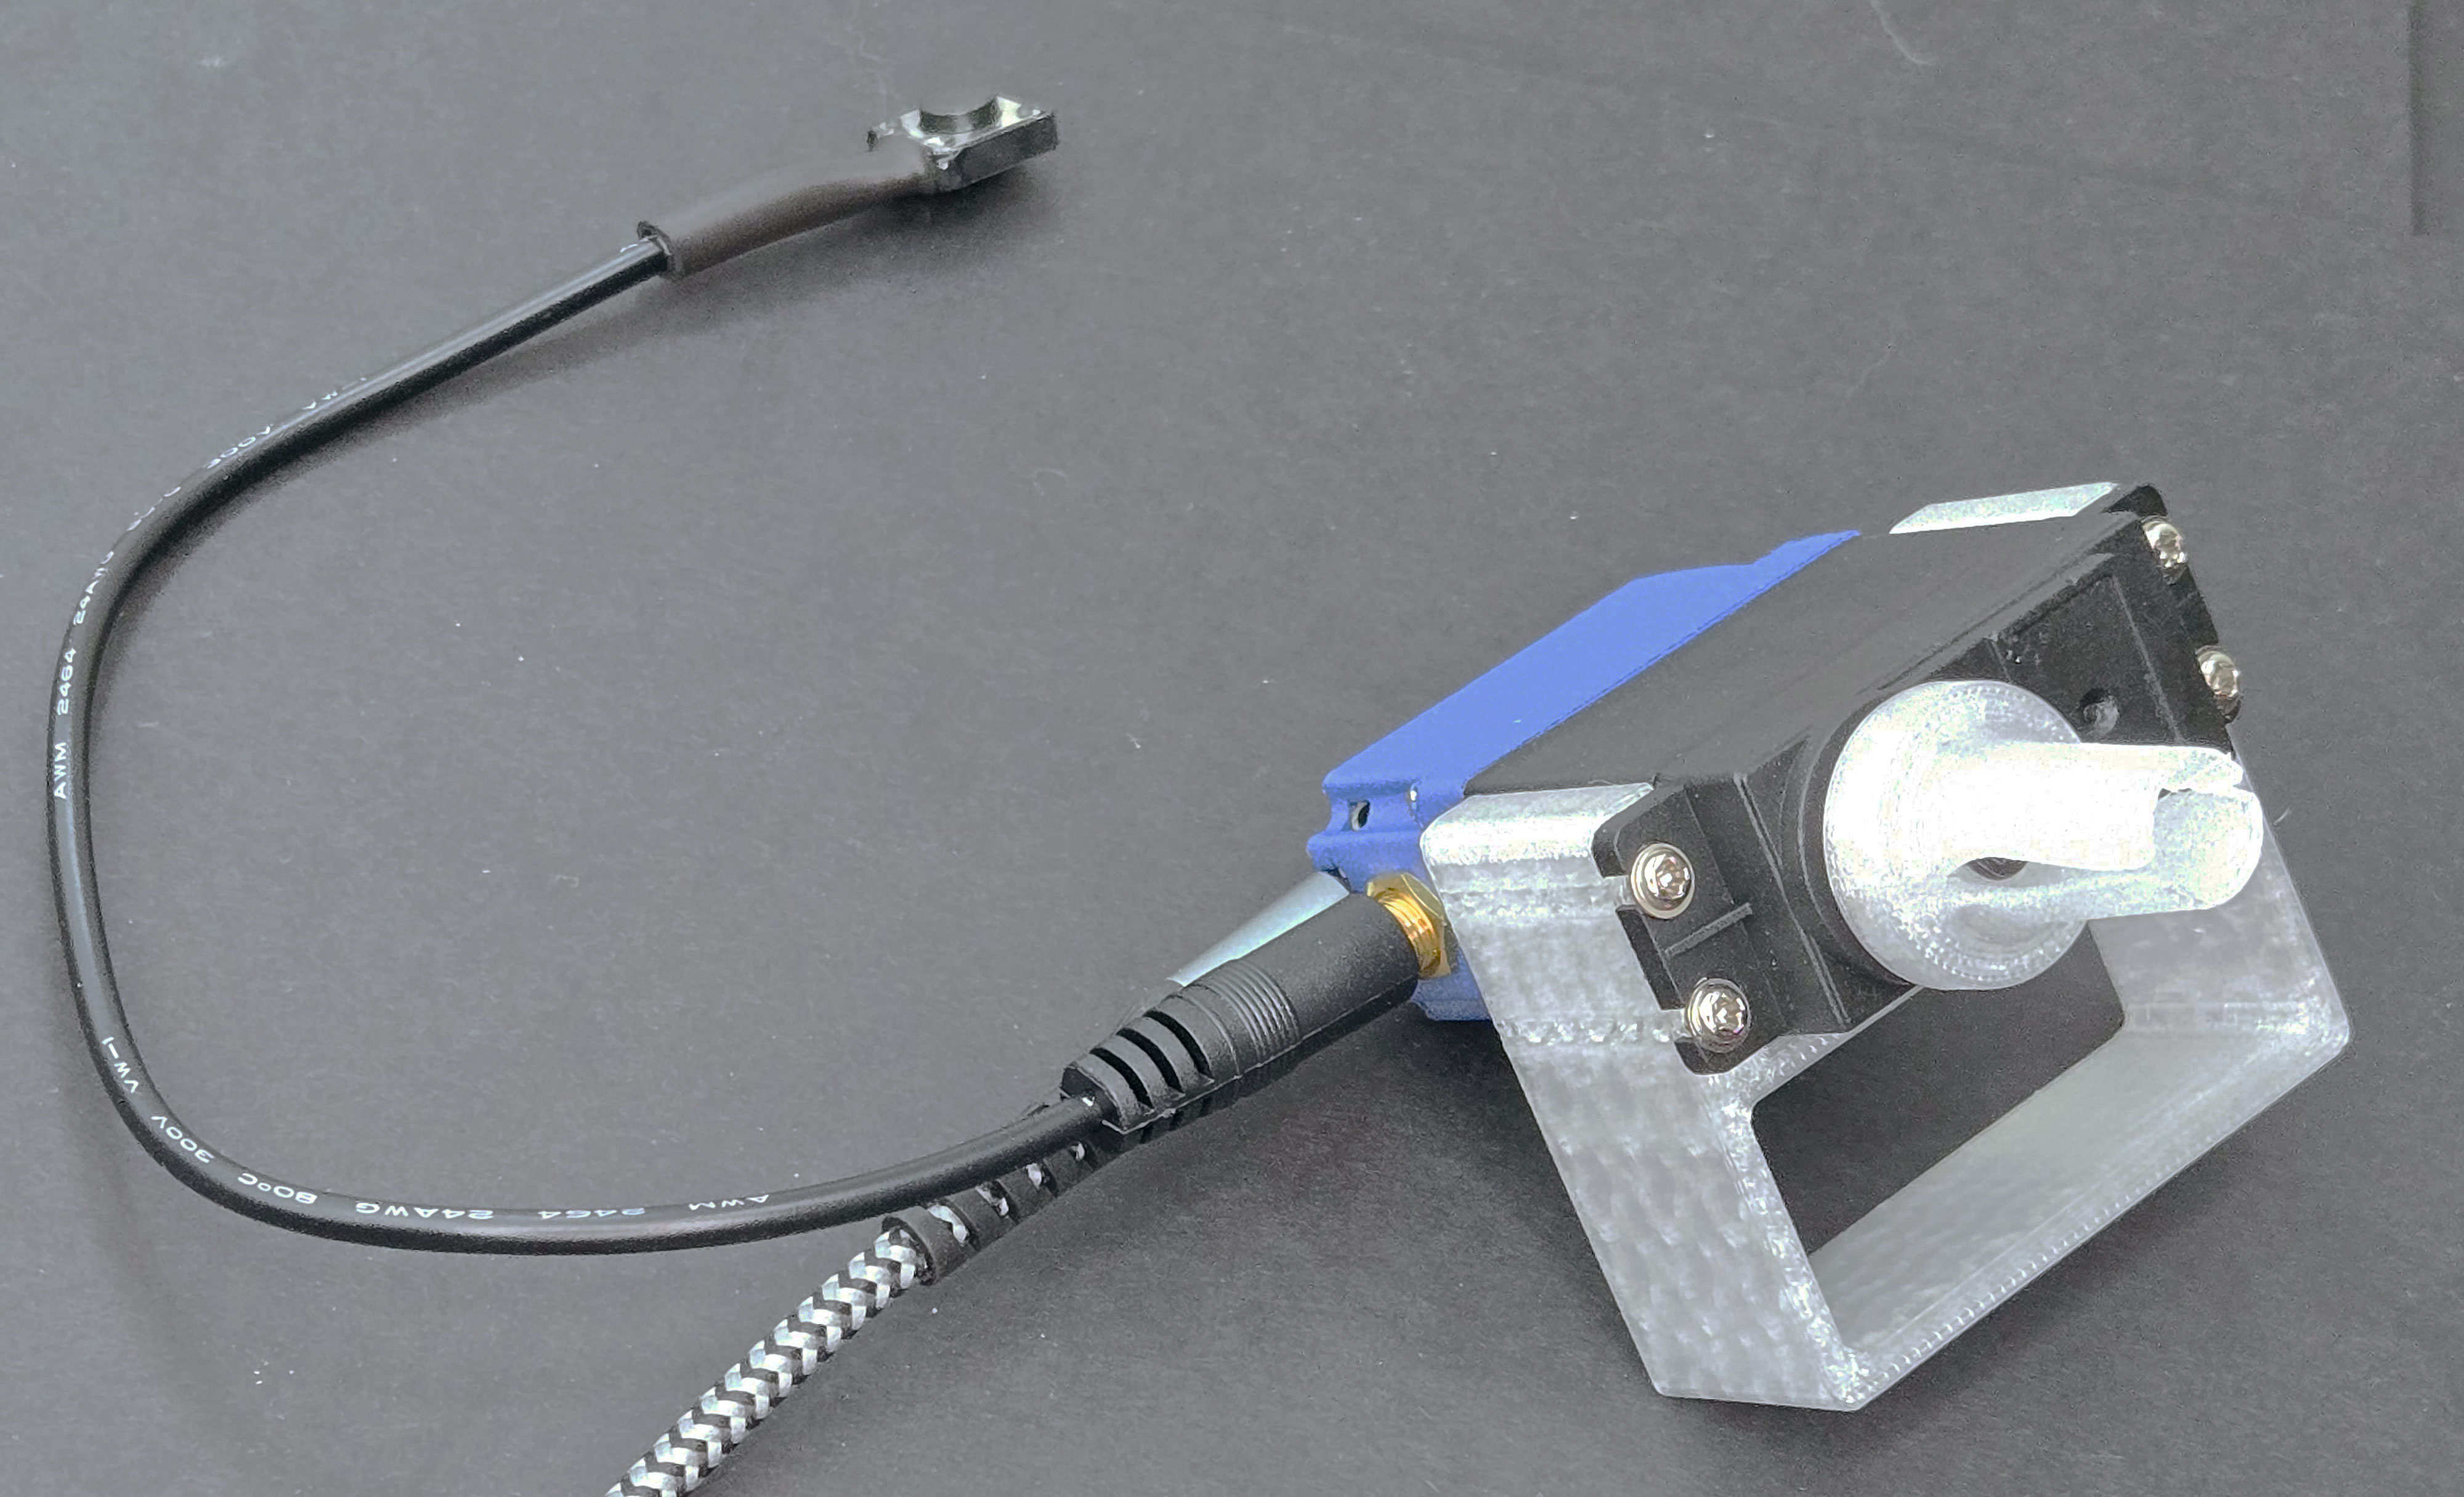
Connect the Button
Plug the AT Test Button into the 3.5mm AUX jack on the Smart Servo.
Position the button where it will be accessible to the user.
# Smart Servo Subscription - Month 1: Automated Page Turner
# Basic Program

import time
import board
import pwmio
import servo
from digitalio import DigitalInOut, Direction, Pull

# Set up the servo
pwm = pwmio.PWMOut(board.A2, duty_cycle=2 ** 15, frequency=50)
my_servo = servo.Servo(pwm)

# Set up the button on pin D2
button = DigitalInOut(board.D2)
button.direction = Direction.INPUT
button.pull = Pull.UP  # Uses internal pull-up resistor

# Starting position - ready position
my_servo.angle = 0

# Variables to track button state
previous_button_state = True  # Pull-up makes the default True
waiting_for_release = False

while True:
    current_button_state = button.value

    # Button is pressed (button.value becomes False when pressed)
    if current_button_state == False and previous_button_state == True:
        print("Button pressed - turning page")
        # Move servo to extended position (turns the page)
        my_servo.angle = 90
        waiting_for_release = True

    # Button is released
    if current_button_state == True and previous_button_state == False:
        if waiting_for_release:
            print("Button released - returning to start")
            # Wait a moment before returning
            time.sleep(1)
            # Return to starting position
            my_servo.angle = 0
            waiting_for_release = False

    # Update previous state for next loop
    previous_button_state = current_button_state

    # Small delay to prevent bounce
time.sleep(0.01)Initial Testing
After saving the code, the servo should move to its initial position (0°).
Press and release the button to test the page turning motion.
The servo should move to 90° when the button is pressed and return to 0° when released.
Position Calibration
If the servo doesn't extend far enough to turn the page, modify the code to increase the angle value (try 100° or 110°).
If the servo extends too far, decrease the angle value.
Example adjustment in the code:
# Change this line:
my_servo.angle = 90
# To something like:
my_servo.angle = 110 # For more extensionTiming Adjustment
If the servo returns too quickly after turning the page, increase the delay time.
Modify the time.sleep(1) value to adjust how long the servo stays extended.
Example:
# Change this line:
time.sleep(1)
# To something like:
time.sleep(2) # Stay extended for 2 secondsPosition Your Book
Place your book or magazine on a table with the spine away from the servo.
Open to the first page you want to read.
Position the page turner so the servo horn can reach the corner of the page.
Adjust Physical Setup
Fine-tune the position of the servo base and angle of the horn attachment.
The page turner attachment should lightly rest against or hover just above the page.
For thicker books, you may need to adjust the height of the page turner.
User Positioning
Place the button in a comfortable, accessible position for the user.
Ensure the book and page turner are visible and within reach for page adjustment if needed.
Practical Usage
Press the button when ready to turn to the next page.
The servo will extend, catch the page, and turn it.
After the button is released, the servo returns to its starting position.
Make minor adjustments to position as you progress through the book.
6. Extensions & Variations
1. Two-Button Control
Modify your setup to use two buttons: one for turning pages forward and one for turning them backward.
This requires adding a second button and modifying the code to recognize different inputs.
2. LED Feedback
Add code to control the built-in LED on the Smart Servo to provide visual feedback.
Make the LED change color when the button is pressed or when the page is turning.
# Advanced Page Turner with LED Feedback
# Add this code to the basic program to add LED control

import neopixel

# Set up the NeoPixel LED
pixel = neopixel.NeoPixel(board.NEOPIXEL, 1)
pixel.brightness = 0.3  # Set brightness (0.0 to 1.0)

# Add these lines inside the button press section:
if current_button_state == False and previous_button_state == True:
    print("Button pressed - turning page")
    # Turn LED blue while turning page
    pixel.fill((0, 0, 255))  # Blue color
    my_servo.angle = 90
    waiting_for_release = True

# Add these lines inside the button release section:
if current_button_state == True and previous_button_state == False:
    if waiting_for_release:
        print("Button released - returning to start")
        # Turn LED green when returning to start
        pixel.fill((0, 255, 0))  # Green color
        time.sleep(1)
        my_servo.angle = 0
        waiting_for_release = False
        # Turn LED off after returning
        time.sleep(0.5)
pixel.fill((0, 0, 0)) # LED off1. Remote Control Activation
Use the page turner to press buttons on a remote control, light switch, or other device.
Mount the servo facing a different direction to press buttons on various devices.
2. Automated Card Dealer
Reposition the servo to deal playing cards one at a time.
Useful for individuals who have difficulty handling cards.
3. Document Scanner Assistant
Position above a scanner to help turn pages for digitizing documents.
Particularly helpful for batch scanning multi-page documents.
7. Troubleshooting Guide
Common Issues:
| Issue | Possible Cause | Solution |
|---|---|---|
| Servo Doesn't Move |
|
|
| Page Turner Doesn't Catch Pages |
|
|
| Button Doesn't Trigger Action |
|
|
| Unpredictable Servo Movement |
|
|
| LED Not Working |
|
|
Support Resources:
- Online Community Forum: smartservo.community/help
- Video Tutorials: smartservo.learning/month1
- Email Support: support@smartservo.subscription.com
8. Reflection & Next Steps
Skill Check:
- Can you explain how a servo motor differs from a regular motor?
- Do you understand how the button input triggers actions in your code?
- Can you identify at least three ways to improve or customize your page turner?
- How might this device help someone with limited hand mobility?
Documentation:
- Take photos of your completed page turner in action
- Note any modifications you made to the basic design
- Record observations about what worked well and what could be improved
- Consider who might benefit from this device and how it could be adapted to their specific needs
Community Sharing:
- Upload photos of your project to our community platform
- Share any code modifications that improved functionality
- Ask questions and provide help to other subscribers
- Consider the accessibility needs in your community and how this technology might help